HOWDY!
okay, so. ill put it short and sweet,
here's a quick attempt at colouring.
with the help of dave the rave.
he taught me the stuff you guys probably already know!
but i thought, meh, u never know they mite learn something new? :P
open the image + colour normally.
create layer & select desaturation.
create another layer and colour it brown and adjust the opacity.
plus some other things, but its stuff amanda explained that day to us in class :) [when kev was there]
awesome.

i found a bit of stuff also on
= colouring comics.
http://forums.creativecow.net/archivethread/2/535441
= info about how to give a movie the 'silent film effect' in photoshop and aftereffects.
i got this info out of it...
First, follow these steps in the order below, but modify each to taste as these were designed to work with our footage
In Photoshop:
- Create a light-grey to deep-grey radial gradient so that the lighter shade is in the centar and gets progressively darker as it reaches the edge.
- Create a new layer and use the add noise filter set to gausian noise and monochrome (do this on about 5 or 6 different sepearate layer modifying the noise filter only slightly each time)
- Copy each of the "noise" layers and ad a directional blur set to 90 degrees and a blur of around 35
In After Effects:
- Import your footage and the above Photoshop file as a composition
- Add posterize time filter and set it to 18fps to your video footage
- Use your hue/saturation filter and drop it to -100
- Use your curves filter and set a slight boost in the mid-tones so that the greys a bit lighter
- Add the brightness/contrast filter and set the brightness to -5 and the contrst to +10
- Open your Photoshop comp and set the noise layers end to end in 3 to 4 frame intervals and make a pre-comp of the noise and blurred noise layers so that it is easier to copy and paste a longer segment and set the transfer mode to overlay. Move your gradient layer to the uppermost level and set the transfer mode to overlay.
- Drop this overlay on top of your video in your main composition and make sure that the transfer mode is set to overlay and set the opacity to your liking.
Now, if this doesn't get you quite close enough, you can always use the Quicktime Pro "old film" filter to create a black and white piece of video that you can overlay over your video and use further transfer modes to blend it, but remember that you'll want to add a bit of film-judder to simulate spocket slippage and the very real problem of over and under cranking of the hand-powered film cameras of the day.
thats it. just some food for thought anyways.
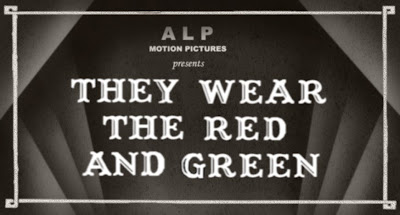
i did some of these film cards up too.
my apologies, i should be doing backgrounds yes.
ive just been bogged down with business and policy this week,
so opted to doing something really quick.
so it looks like i havent done nothing :D


thats all from me today.
hope its helpful x x

 fiddled with the unit. and coloured it. just to see what it would look like.


